Meet the Makers - Brand 88
All our clothing is hand screen printed down the road from us in Newquay at Brand 88. We love to support local manufacturing and we couldn’t get much closer if we tried! We had the pleasure of spending the afternoon with Pat, observing as he hand screen-prints our products and admiring the process. A traditional method that is both a skill and an art.


A hive of activity, the workshop is sensory overload with tall stacks of clothing, screens scattered around and bursts of colourful artwork everywhere. Pat told us that they had been so busy that they had had to pause orders for a week. It’s exciting to know that this printing method is still in high demand. Hand screen printing is a skilled, analogue printing technique which has been used for decades. Nowadays there are many alternative digital printing techniques available, which are often quicker and cheaper but, in our opinion, nothing beats the authenticity and finish achieved through screen printing.

The (Pats) Process:
Step One – Exposing the screen
The mesh screen is coated in a light sensitive emulsion which once dry, is exposed with the artwork. The artwork is often printed on acetate and the design blocks the light reaching the screen. The screen is then washed thoroughly to remove the emulsion. The areas of emulsion that were not exposed to light dissolve, leaving a negative stencil of the image on the mesh.

Step Two – Preparing to print
The screen is placed into the printing press, ensuring it is correctly aligned. This can take a moment of concentration and precision, especially if it’s a multiple colour print like our surf club hoodies! Pat does a test print to check that the 3 screens for each colour are in the right position. Once satisfised, he places the garment being printed onto the printing board.

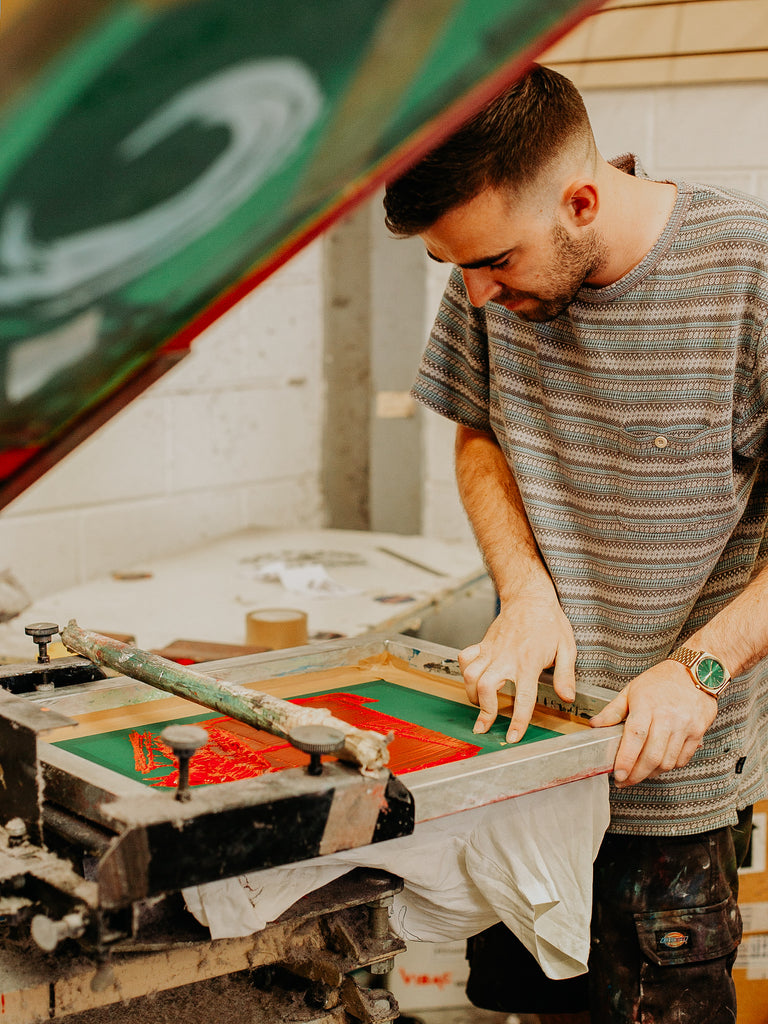
Step Three - Printing
The time has come to finally print the design! The screen is lowered down onto the printing board. A generous dollop of ink is added to the top of the screen and then a squeegee is used to pull the ink along the full length of the screen to saturate the mesh. The squeegee is then used again to firmly press down and pull in think across the screen in one swift movement. This presses the ink through the open areas of the stencil, imprinting the design on the clothing underneath. Now for the moment of truth, the screen is lifted to reveal the print. When printing multiple items, the screen is raised, and a new product is placed beneath. The process is then repeated.

Step Four – Drying & Final Checks
The printed garment is then passed through a dryer to fixes the ink and creates a smooth, colourfast finish. The products are then carefully checked and folded ready for collection.